
2026-10-15
How to Measure a Torsion Spring: The Complete Professional Guide
Ordering the wrong torsion spring is one of the most expensive mistakes in garage door repair. A spring that is even slightly off in wire size, length, or wind direction will leave your door unbalanced, strain your opener to death, and create a genuine safety hazard. This guide shows you exactly how professionals measure a torsion spring — the same method we use on every job across Broward County.
Why Measuring Your Torsion Spring Correctly Matters
A torsion spring is not a generic part. It is a precision-engineered counterbalance matched to your door's exact weight and height. When the spring size is right, a 200-pound door feels like it weighs ten pounds. When it is wrong, everything goes sideways.
Install a spring with a wire gauge that is too light, and the door stays heavy. Your opener — designed to move a balanced door, not deadlift hundreds of pounds — strains on every cycle. Motors overheat, nylon drive gears strip, and a spring replacement that should have been a single service call turns into a spring plus opener job. Install a spring that is too heavy, and the door over-lifts. It can fly open on its own, slam down without warning, or hang crooked in the tracks. Both scenarios are dangerous, and both are completely avoidable with a tape measure and five minutes.
There is also a subtler problem. A mismatched spring wears out far faster than a correct one, because it is constantly operating outside its designed torque range. Homeowners who guess at spring size often find themselves replacing springs twice as often, paying double for the privilege of a door that never worked right in between. Measure once, get it right, and the spring lasts its full rated life — typically around 10,000 cycles, or roughly seven years of normal use.
The Four Measurements That Define Your Spring
Every torsion spring is fully described by four numbers. If you know all four, any professional supplier or technician can hand you the exact replacement with zero guesswork.
1. Wire Size (Wire Gauge)
This is the thickness of the steel wire the spring is wound from, and it is the single most important measurement. Wire size determines the spring's lifting power. Common residential sizes range from .207 to .273 inches, and the difference between adjacent sizes is small enough that you cannot eyeball it — which is why the 20-coil measurement method exists.
2. Inside Diameter
The inside diameter (ID) is the measurement across the hollow center of the spring. Most residential garage door torsion springs use a 1-3/4 inch or 2 inch inside diameter. The spring must fit snugly over the torsion tube or shaft; too loose and it wobbles and wears unevenly, too tight and it will not fit at all.
3. Overall Length
The total length of the unwound spring, measured end to end including the winding cones. Length determines how many turns of torque the spring can store. A spring that is too short cannot be wound enough to balance the door; a spring that is too long bottoms out before reaching full tension.
4. Wind Direction (Left Wind or Right Wind)
Torsion springs are wound in a specific direction, and installing a spring with the wrong wind is one of the most common DIY disasters. A right-wind spring installed where a left-wind belongs will unwind instead of winding when you tension it. We will show you exactly how to identify wind direction below.
The 20-Coil Method: Measuring Wire Size Step by Step
This is the professional method, and it works because it multiplies a tiny measurement into a readable one. The difference between a .225 and a .234 wire is nine thousandths of an inch — invisible to the eye and hard to measure directly. But across 20 coils, that difference becomes nearly a quarter inch on your tape measure. Here is how to do it.
Step 1: Work with the door closed and the opener disconnected. Safety first. The door should be fully closed so the springs are at rest tension, and the opener should be unplugged or disconnected so nothing moves while you measure.
Step 2: Count 20 coils. On the unbroken spring, mark your starting coil with a piece of tape or a marker. Count 20 full coils along the length of the spring. A full coil is one complete revolution of wire. Take your time — miscounting by even one coil throws off the entire measurement.
Step 3: Measure end to end in inches. Hook your tape measure at the start of coil one and read the measurement at the end of coil twenty. Measure to the nearest eighth of an inch. Write the number down.
Step 4: Match your measurement to the wire gauge chart. Find your 20-coil measurement in the chart below, and read across to the wire size. That is your spring's wire gauge.
Torsion Spring Wire Size Chart
Match your 20-coil measurement (in inches) to the wire gauge. This chart covers every standard residential torsion spring size.
| Wire Gauge | .207 | .218 | .225 | .234 | .243 | .250 | .262 | .273 |
|---|---|---|---|---|---|---|---|---|
| 20-Coil Measurement | 4 1/8″ | 4 3/8″ | 4 1/2″ | 4 3/4″ | 4 7/8″ | 5″ | 5 1/4″ | 5 1/2″ |
Tip from the field: if your measurement falls between two values, re-count your coils. A measurement that does not match the chart almost always means a miscounted coil, not a non-standard spring.
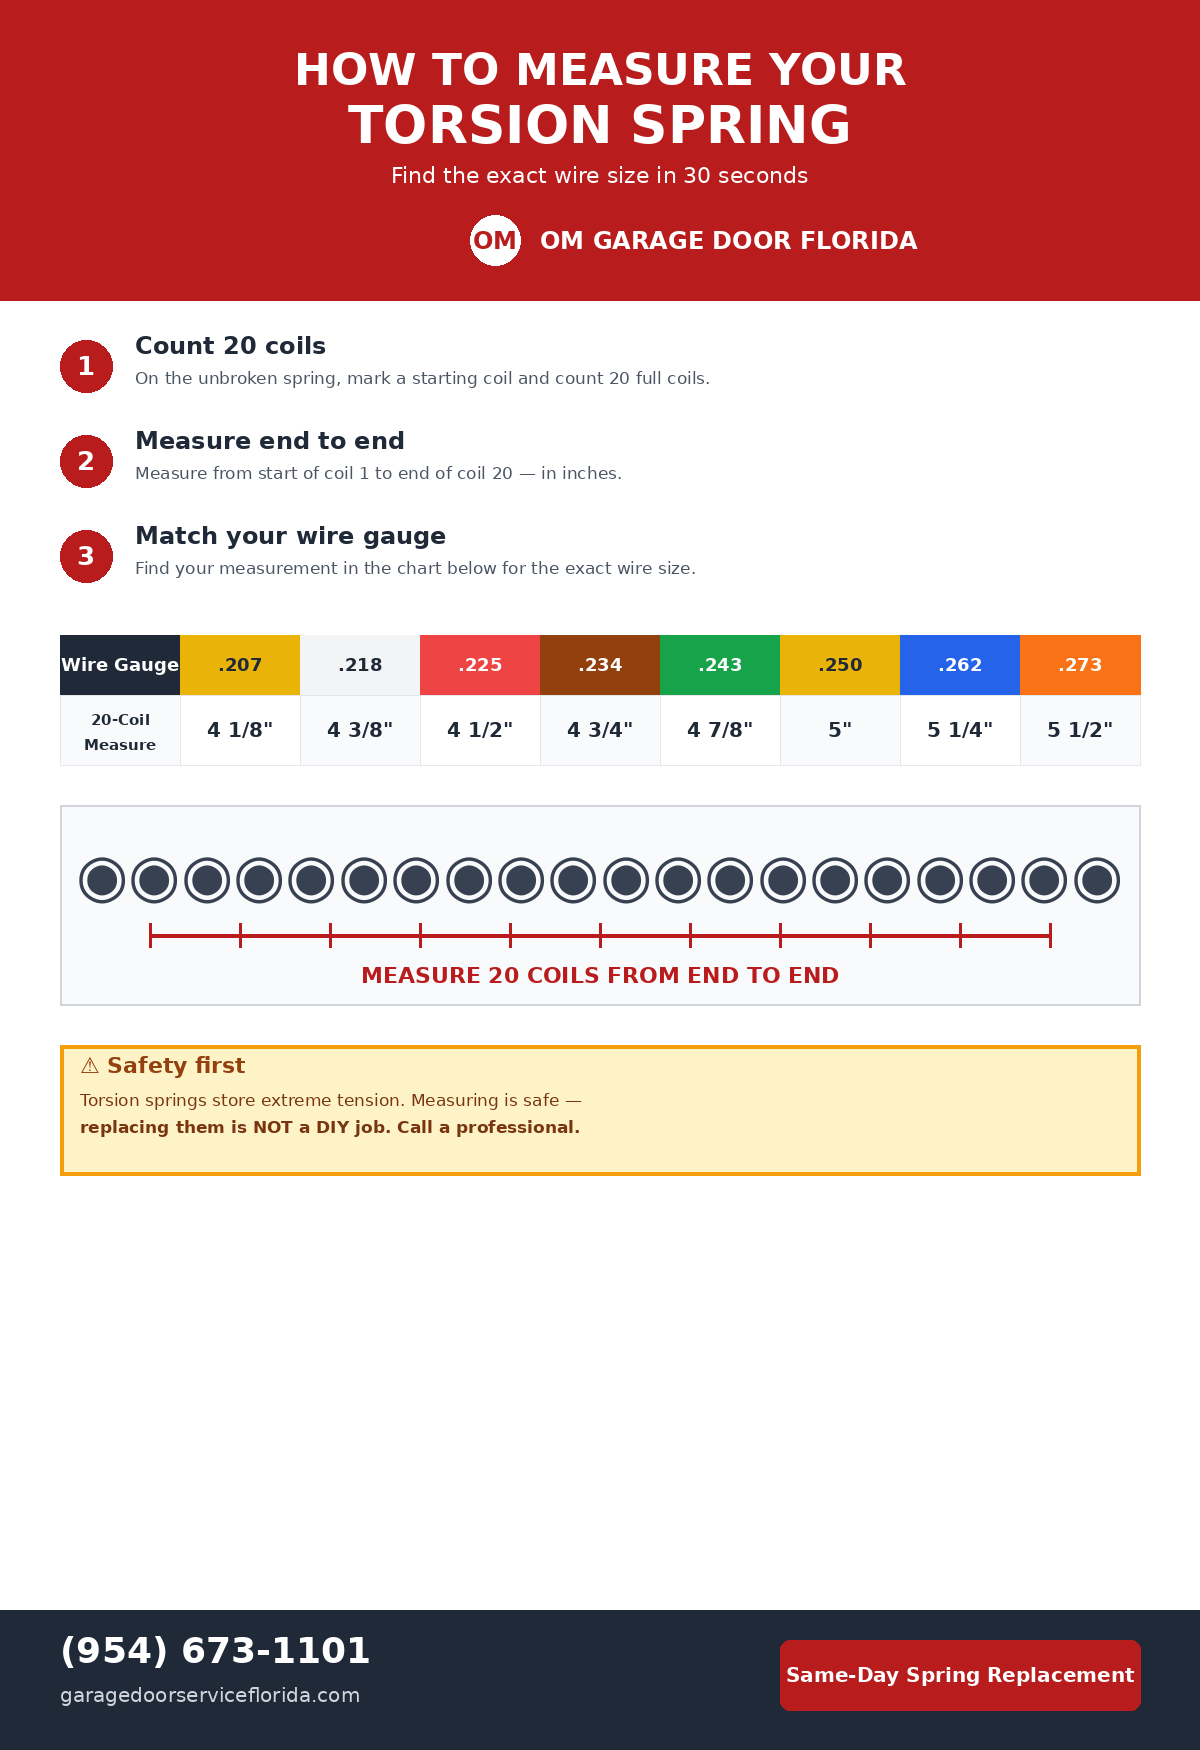
Our original infographic: how to measure a torsion spring in three steps. Free to share with credit to OM Garage Door Florida.
How to Measure Inside Diameter
Inside diameter is straightforward but easy to get wrong if you measure the wrong thing. You want the diameter of the hollow opening inside the coil — not the outside of the spring. The simplest reliable method is to measure the torsion tube or shaft the spring sits on, since the spring's inside diameter is made to fit it. Standard residential sizes are 1-3/4 inches and 2 inches. If you are measuring the spring directly, use calipers across the opening at the end of the spring, measuring the inner edges of the coil. Do not measure the outside diameter and subtract — coil wire thickness varies, and the math introduces error. When in doubt, 2-inch ID is the most common size on modern residential doors in Florida.
How to Measure Spring Length
Measure the spring from end to end, including the winding cones, with the spring unwound and at rest. This is the one measurement you cannot take from a broken spring, because pieces are missing. On a two-spring door where one spring broke, measure the intact spring — both springs on a standard door are the same length. Write the length down in inches, and note that professional spring sizing always uses the unwound length. A spring under tension measures shorter than its true length, which is another reason to measure with the door fully closed and the springs at rest.
Left Wind vs Right Wind: How to Tell the Difference
This is where most DIYers go wrong, and the consequences are immediate. A spring with the wrong wind direction will not tension correctly — it unwinds when you try to wind it, and the door cannot be balanced.
The industry uses a simple color code on the winding cones: red cones indicate a right-wind spring, black cones indicate a left-wind spring. Look at the cone on the end of the spring. Red means right-wind. Black means left-wind. It is that simple.
On a standard two-spring door viewed from inside the garage, the layout is always the same: the spring on the left side is right-wind (red cone), and the spring on the right side is left-wind (black cone). They mirror each other. If you are replacing both springs — which we recommend, since the second spring is living on borrowed time once the first breaks — order one of each.
There is a physical way to double-check. Hold the spring vertically and look at the direction the coil spirals. But honestly, the color code is faster and foolproof. If the cones are too rusted to read the color, that is itself useful information — heavily corroded springs are overdue for replacement, especially in Florida's salt air.
Common Measuring Mistakes (And How to Avoid Them)
After years of service calls across Broward County, we have seen every measuring error in the book. Here are the ones that cause the most trouble.
Mistake 1: Counting 10 coils instead of 20. Some online guides suggest measuring 10 coils and doubling. Do not do this. Any small error in your count or measurement gets doubled too. Always count the full 20.
Mistake 2: Measuring a stretched or distorted section. Near a break, coils stretch and deform. Measure a clean, undistorted section of the spring — ideally on the intact spring of a two-spring door.
Mistake 3: Guessing the wind direction. Never assume. Check the cone color every time. A wrong-wind spring is completely useless, and you will not discover the error until you are halfway through a dangerous winding procedure.
Mistake 4: Measuring outside diameter instead of inside. The number that matters for fit is the inside diameter. Measuring the outside and subtracting wire thickness introduces compounding errors.
Mistake 5: Forgetting that Florida kills springs faster. This is not a measuring mistake, but it matters. Salt air and humidity corrode spring steel, and a corroded spring measures slightly different from a new one. If your springs are visibly rusty, tell your technician — it affects both sizing and the recommendation to replace both springs at once.
Safety: Measuring Is Safe — Replacing Is Not a DIY Job
Let us be completely clear about where the line is. Measuring a torsion spring is safe. You are looking, counting, and holding a tape measure. Nothing is under your control that can hurt you, as long as you do not touch the winding cones, insert any tool into the spring, or attempt to loosen anything.
Replacing a torsion spring is genuinely dangerous and should never be a DIY project. A wound torsion spring stores hundreds of pounds of rotational force in coiled steel. The replacement procedure requires seating winding bars fully and squarely into the winding cone, working from a rock-stable ladder, and applying precise quarter-turn increments. If a winding bar slips — and they do — it becomes a projectile. If the spring releases unexpectedly, it whips with enough force to break bones, and we are not exaggerating. Emergency rooms see these injuries every year, and they happen to capable, careful people who watched a twenty-minute video and felt confident.
The videos make it look easy because the person filming got lucky, or because they have done it five hundred times and their hands know things the camera cannot teach. There is no savings worth the risk. We carry the common spring sizes on the truck, most replacements are finished in under an hour, and you approve a firm upfront price starting from $155 before any work begins.
When to Call a Professional
Honestly? The moment you have your measurements, or even before. Here is the practical reality: knowing your spring size is useful information, but the value of a professional visit goes far beyond swapping the part. A technician verifies your measurements against the door's actual weight and height, checks whether both springs should be replaced, inspects cables, drums, rollers, and bearings while the door is apart, rebalances the door precisely, and tests everything before leaving. Most spring failures we see in Broward County come with companion wear — a fraying cable, a cracked drum, rollers that are years past their prime — and catching those in the same visit saves you a second service call.
If your spring is already broken, do not wait. A door with a broken spring puts destructive strain on the opener every time someone presses the button, and the repair bill grows with every attempt. Our spring replacement service covers all of Broward County with same-day appointments, upfront pricing, and springs stocked on the truck. Learn more about garage door repair or see upfront prices. Call OM Garage Door Florida at (954) 673-1101 — we answer 24/7.
Frequently Asked Questions
Can I measure a torsion spring while it is still wound on the door?
Yes, you can safely measure an intact (unbroken) torsion spring while it is mounted. The 20-coil method works with the spring in place. Just do not attempt to loosen, unwind, or remove the spring — that is where the danger begins.
What happens if I install the wrong size torsion spring?
An undersized spring leaves the door too heavy, straining and eventually destroying the opener. An oversized spring over-lifts the door, which can slam it down or cause it to fly open unexpectedly. Both situations are dangerous and will cost far more than getting the right spring the first time.
How do I know if I need a left-wind or right-wind spring?
Look at the winding cones on the ends of the springs. The industry color code is simple: red cones indicate a right-wind spring, black cones indicate a left-wind spring. On a standard two-spring door, the left spring (viewed from inside the garage) is right-wind and the right spring is left-wind.
Can I measure a broken torsion spring?
You can measure the wire size and inside diameter from a broken spring, but you cannot get an accurate overall length because pieces are missing. The most reliable approach is to measure the intact spring on a two-spring door, or have a professional identify the correct size from the door's weight and height.
Is it safe to measure a torsion spring myself?
Yes — measuring is completely safe as long as you only look and measure. Never touch winding cones, never insert tools into the spring, and never attempt to unwind or remove it. The danger comes from releasing the stored tension, not from measuring. Replacement should always be done by a trained technician.